Build your own Homelab with a Raspberry Pi Zero 2 W and Cloudflare Zero Trust
Build your own Homelab with a Raspberry Pi Zero 2 W and Cloudflare Zero Trust
Ever wanted to build your own homelab? Well, now you can with a Raspberry Pi Zero 2 W and Cloudflare Zero Trust, and it's easier than you think.
The big picture is something like this
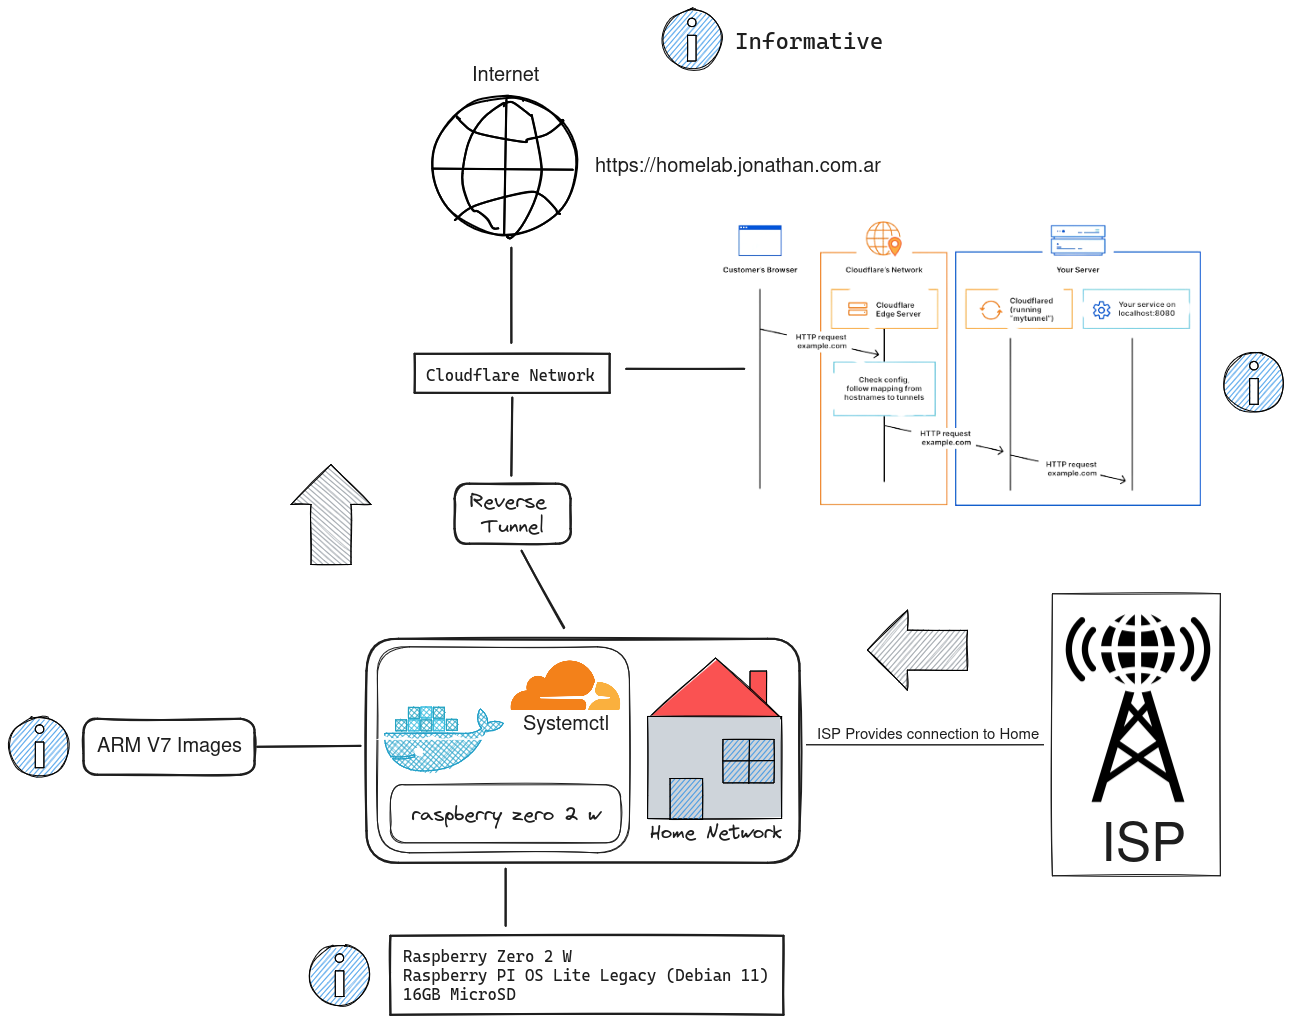
In case you want to check the repository where i'm experimenting with this, you can check it out here.
What is a Homelab? 🏠
A homelab is a collection of hardware and software that you can use to learn and experiment with new technologies. It's a great way to learn about networking, virtualization, and other technologies that you might not have access to at work or school.
What do we need? 🧰
- Raspberry Pi Zero 2 W (or any other Raspberry Pi)
- MicroSD Card (at least 16GB)
- USB-C Power Supply
- Cloudflare Account
- Internet + WiFi
Assuming you already have the Raspberry Pi and the MicroSD Card, let's get started.
Installing Raspberry Pi OS 🍓
First, we need to install Raspberry Pi OS on the MicroSD Card. You can download the latest version of Raspberry Pi OS from the Raspberry Pi website.
Depending on your operating system there is different options to choose from.
Once you have the software installed, you can insert the MicroSD Card into your computer and open the Raspberry Pi Imager.
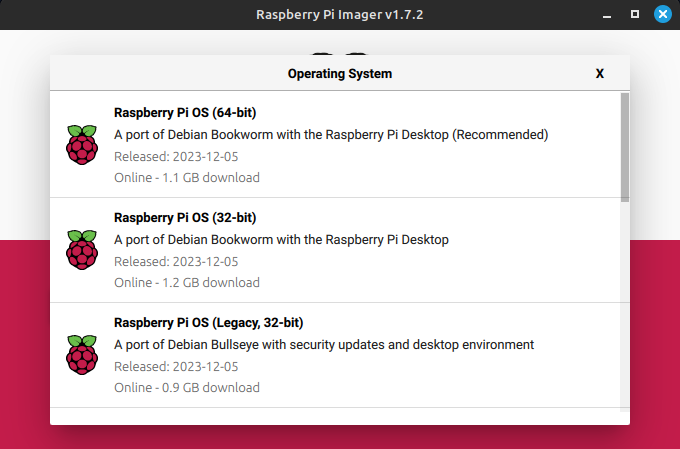
Now for OS we are going to use Raspberry Pi OS (Legacy) Lite because it's the smallest and most lightweight version of Raspberry Pi OS, in case you are using a Raspberry Pi Zero 2 W like me.
Also something obvious, but choose the storage device that is your MicroSD Card.
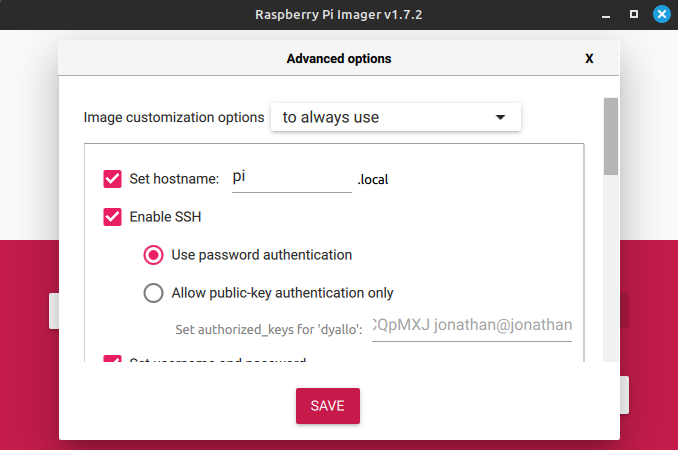
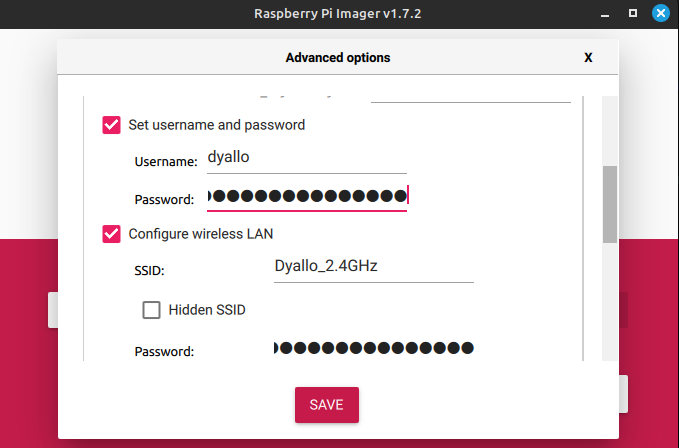
Now in the configuration part, we are going to enable SSH and WiFi, so we can connect to the Raspberry Pi Zero 2 W without a monitor or keyboard, also create a new user and password.
If installation was successful, you should see a new drive called boot in your file explorer.
If by any chance you get an error you will likely need another MicroSD Card.
Starting the Raspberry Pi Zero 2 W 🚀
Now that we have the MicroSD Card ready, we can insert it into the Raspberry Pi Zero 2 W and connect it to the power supply.

If you see a light on the Raspberry Pi Zero 2 W, it means it's working, first boot can take a while, so be patient.
Now is time to SSH into the Raspberry Pi Zero 2 W, if you are using Windows you can use Putty, if you are using Linux or MacOS you can use the terminal.
ssh <username>@pi.local
And we are in!

Create the Cloudflare Tunnel 🚇
Login to your Cloudflare account and go to the Zero Trust section.
Under the Access section, click on Tunnels.
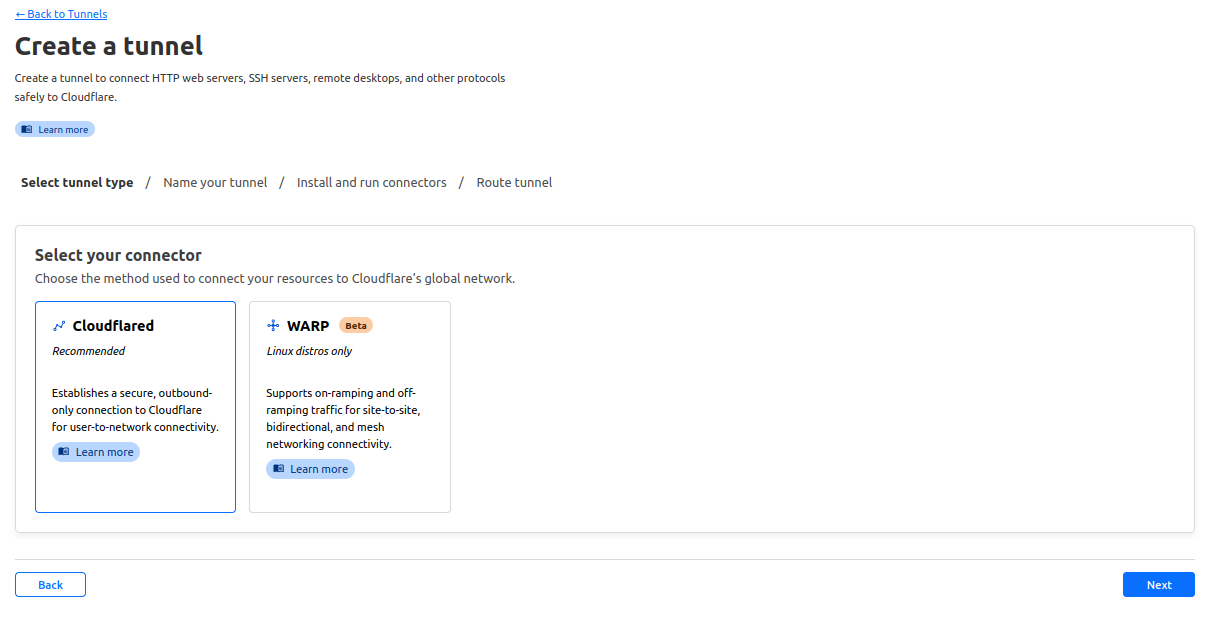
Now lets click on Create Tunnel, give it a name and click on Save tunnel.
Now lets download our cloudflared package, go into cloudflared and download the one called cloudflared-linux-armhf.deb (inside your Raspberry Pi Zero 2 W), we do this with wget.
wget https://github.com/cloudflare/cloudflared/releases/download/2023.10.0/cloudflared-linux-armhf.deb
Now we can install it with dpkg.
sudo dpkg -i cloudflared-linux-armhf.deb
Now we can install our tunnel with cloudflared.
sudo cloudflared service install <token>
If we check out now the previous page, we should see our tunnel online.
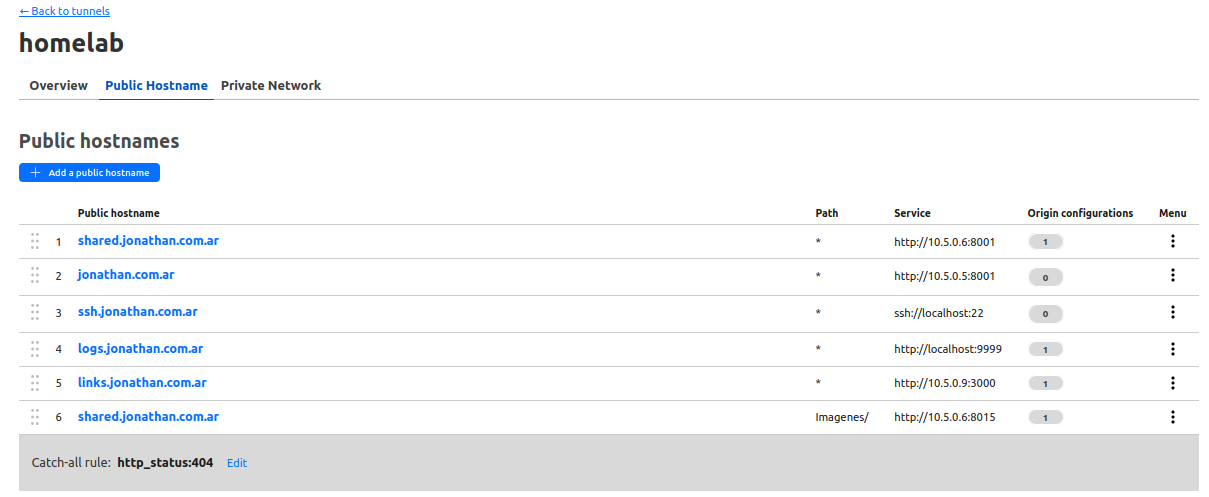
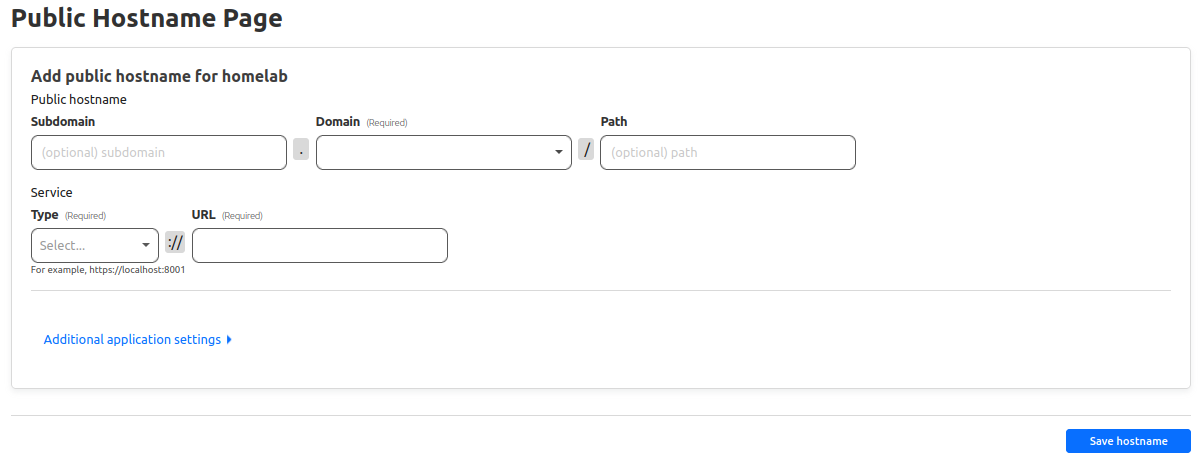
Going back inside the tunnel from the zero trust dashboard now we can enter under Configure then Public Hostname and add a hostname, this will be the hostname that we will use to access our Raspberry Pi Zero 2 W.
Here are some examples:
- Subdomain:
example - Domain:
jonathan.com.ar - Path: We are not going to use a path
- Type:
HTTP - URL:
localhost:<port>
At this point from cloudflare everything is ready, now we need to throw some applications inside our Raspberry Pi Zero 2 W.
Running applications inside the Raspberry Pi Zero 2 W 📦
Here is up to you what you want to run and how, the important part is that you need to expose the port of the application to the internet, so you can access it from the hostname that we created before.
In my case its something like this
├── game-server
│   └── docker-compose.yml
├── irc
│   └── docker-compose.yml
├── pi-hole
│   └── docker-compose.yml
├── portfolio
│   ├── data
│   │   ├── experiences.txt
│   │   ├── homelab.txt
│   │   ├── libraries.txt
│   │   ├── projects.txt
│   │   ├── roms
│   │   │   └── pokemon_red.gba
│   │   ├── socials.txt
│   │   └── templates.txt
│   ├── docker-compose.yml
│   └── Dockerfile
├── status
│   └── docker-compose.yml
└── web-arcade
    ├── docker-compose.yml
    ├── Dockerfile
    └── page
        ├── assets
        │   ├── Fire_Emblem_The_Sacred_Stones.JPG
        │   ├── pokemon-fire-red-version-v1-1.jpg
        │   └── Shining_soul_boxart.jpg
        ├── index.html
        ├── roms
        │   ├── fire_emblem.gba
        │   ├── pokemon_red.gba
        │   └── shining_soul.gba
        ├── scripts
        │   └── index.js
        └── styles
            └── styles.css
And if I do a docker ps I can see all the containers running.

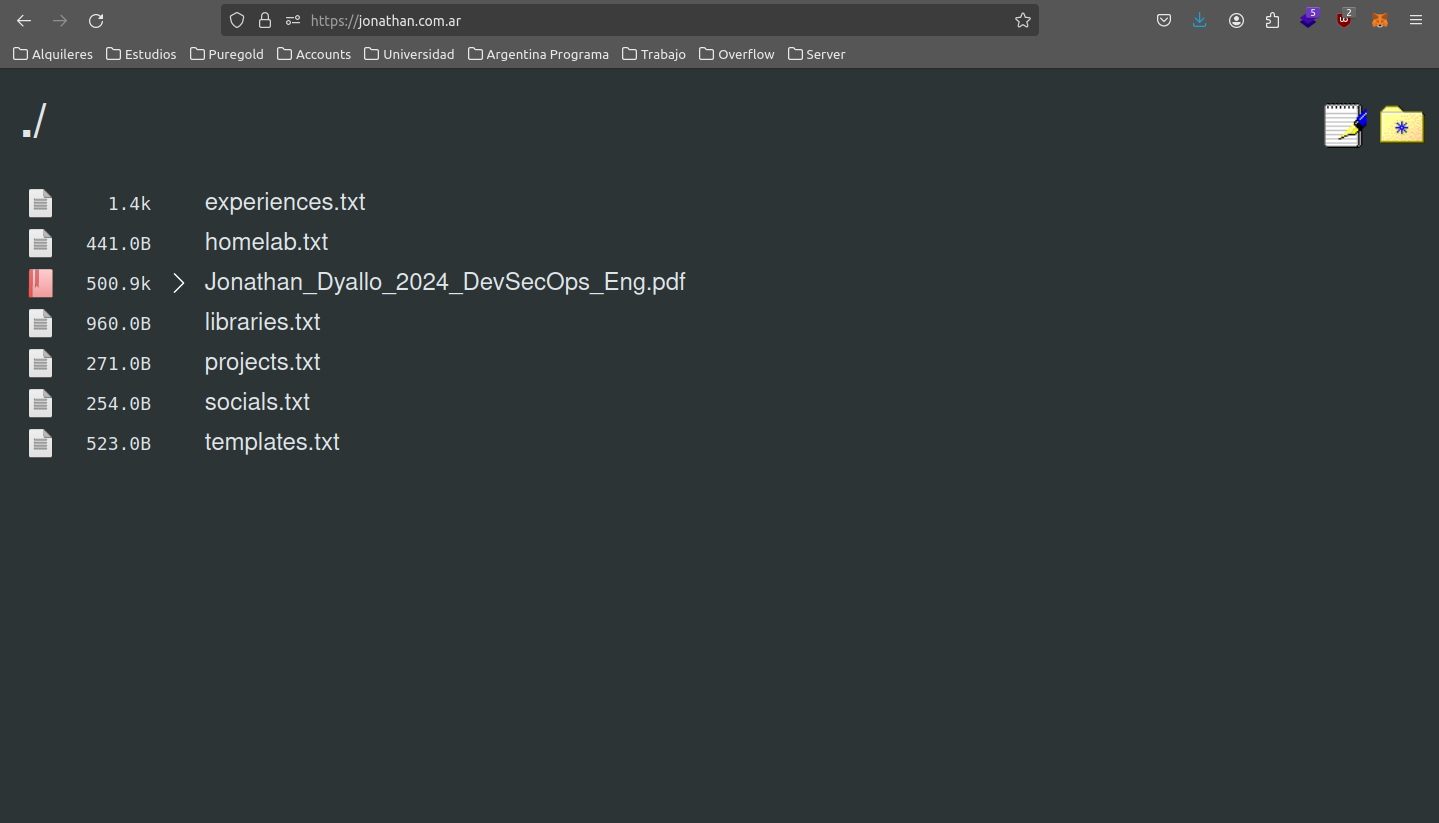
Once we have our applications exposed we could access them from the internet.
Conclusion 🏁
And that's it, we have our own homelab running on a Raspberry Pi Zero 2 W and Cloudflare Zero Trust.
If you have any questions or suggestions, you can contact me on Socials